So what is Spring Fair? Probably the best way to describe Spring Fair is that it is a B2B (business to business) trade show for the retail market.This show attracts thousands of customers from around the world looking to buy new and exciting products for their shops, stores and showrooms.
Spring Fair has been an annual event for me for many years. Each year I have had the honour and privilege (and what some might call daunting task) of creating a variety of displays for the Qualatex stand. My remit is to create displays that displays new and existing products in a creative way to promote and inspire customers visiting the stand.
Due to the worldwide pandemic, last year's show was cancelled, as with most events! As you can imagine, myself and the Pioneer Europe Team were extremely happy to be back once again!
 |
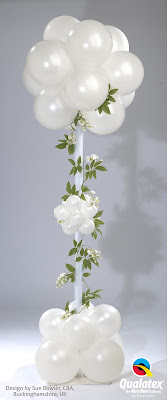
| Design by Sue Bowler, CBA |
Meet the Pioneer Europe Team and Instructors
 |
Pioneer Europe Team & Instructors
|
The Window Displays
 |
| Designs by Sue Bowler, CBA |
This year I was assigned four themes to create designs for, and each theme required two displays. It is the first time that I have made displays for double-decker windows, and so I was a little unsure how it would work. I am happy to report that it was successful!
These are the themes I got to create for:
- Dinosaur
- New Baby
- Adult Milestone Birthday
- Child Birthday
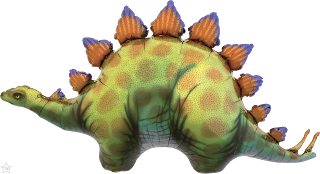
Dinosaur theme
If I am honest, when I was first asked to create a display with the Dino theme, I was a little concerned, as this is not a 'subject' that I usually work with! However, it proved to be one of my favourite window displays ever, and offered me the opportunity to step outside of my usual style! The tree that I made was actually created in inspiration of the extremely talented Alberto Falcone, CBA. Alberto is a true artist and everything that he makes is a work of art!
 |
| Sue Bowler with her Dinosaur window display |
 |
| Design by Sue Bowler, CBA |
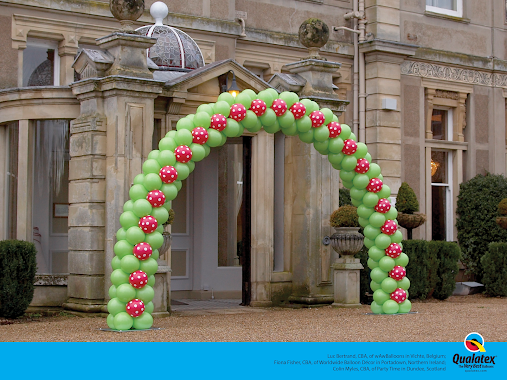
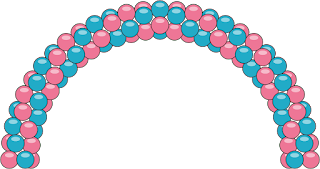
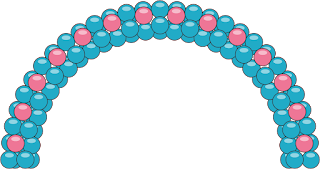
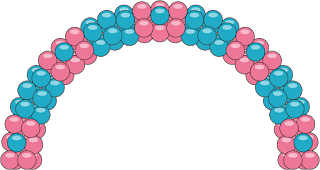
The hoop display below had a mobile effect, and gently spun around with slight air movement.
The hoop design was made on PVC electrical conduit that was secured with a push fit connector. Using PVC conduit allowed me to make the hoop the size that I required for the design.
Qualatex Balloon Colours
All the balloons were double-stuffed: this is something that I always do when I create displays for events such as this. This ensures that the balloons last the duration of the event, plus I like to create custom colours to give tonal changes and create new and exciting colours! This colour selection would also be perfect for a Harry Potter themed party.
Qualatex
Mocha Brown
Emerald Green
Spring Green
Sparkling Burgundy
Green
Chrome Gold
Baby Theme
 |
| Design by Sue Bowler, CBA |
 |
| Design by Sue Bowler, CBA |
 |
| Design by Sue Bowler, CBA |
 |
22" Baby Girl Pink Confetti Dots Bubble
#10035 |
 |
41" Baby Girl Garland
#17765 |
 |
38" Baby Girl Dark Skin Tone
#18943 |
Adult Milestone Display
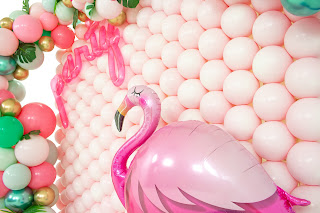
I love a pink and floral display, so as you can imagine this was a favourite for me. In this display I featured the fabulous new 33" Pink Peony and the 22" Birthday to You Pink Peonies Bubble balloon. I also used one of my favourites, the 18" Birthday Pink & Gold Dots, which is such an elegant balloon. I accented my designs with beautiful silk peonies and greenery. For the smaller window, I created a heart using a heart frame and added balloons in an organic style. The colours that I used are:
Qualatex
Pink
Rose
Wild Berry
Pearl Pink
White
Chrome Gold
Mocha Brown - Inside Rose and Pearl Pink
 |
| Design by Sue Bowler, CBA |
 |
| Design by Sue Bowler, CBA |
 |
| Design by Sue Bowler, CBA |
 |
| Design by Sue Bowler, CBA |
 |
22" Birthday to you Pink Peonies Bubble
#18649 |
 |
33" Pink Peony
#18712 |
Child Milestone Display
The fourth and final window display was to show the new Birthday Blue Dots (Ages 1-5) and the Birthday Boy Blue Dots balloons. This was such a fun display to make. I created a number 3 frame and made some Monkey Balloon Buddies... all of which would be perfect for a 3 year olds birthday!
 |
18" Birthday Boy Blue Dots
#18874 |
 |
18" Age 3 Blue Dots
#23109
|
 |
| Design by Sue Bowler, CBA |
 |
| Design by Sue Bowler, CBA |
The colours that I used in this display are:Qualatex
Pale Blue
Pearl Light Blue
Robin's Egg Blue
Caribbean Blue
White
Pearl Azure
Chrome Gold
In Part 2, I will show you the "Four Seasons" displays that Alberto Falcone and I made, along with other attractive features from the stand!
I hope that you enjoyed seeing all these designs, and that it might give you a little inspiration for your own displays and designs!
Happy Ballooning!
Sue