Showing posts with label centrepiece. Show all posts

Wednesday, June 6, 2012

A little inspiration for Air-Filled Table Arrangements

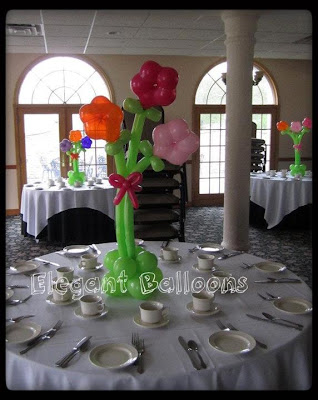
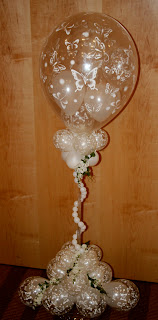
Creating arrangements and centrepiece designs working with air rather than helium can appear to be a little more challenging. 

However, there are a number of different idea's that we can successfully use to create great designs every time!

Here are a few inspiring idea's that I have spotted on the Qualatex Facebook Group page!

Anne Cahill McGovern
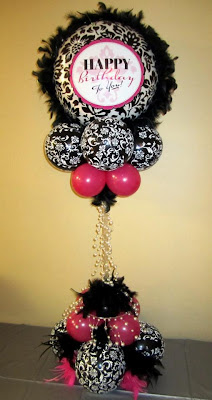
Design by Anne Cahill McGovern

This first design is by Anne Cahill McGovern, and is absolutely beautiful. I love the use of the Birthday Elegant Damask #30986 complimented with the Black Damask 11" latex balloons #33503 (assorted), with 5" Wild Berry. Anne has used a black feather boa for visual texture and movement within the design, along with some added pink feathers and 'pearl' beads. This design for me is fun, elegant, feminine, trendy, fashionable and charming, truly perfect for a birthday celebration!


Nadia   Azar
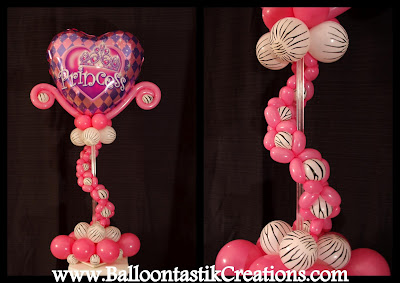
Design by Nadia Azar
Another truly inspiring design from Nadia Azar. Nadia has very cleverly created this design with a great combinations of balloons. The focal balloon is the Princess Tiara #82027 and complimented with Rose Pink 5, Rose Pink 160Q's and 5" Zebra Prints! The visual lines and movement are very elegant, but this design also evokes a sense of fun and fashion with the use of the animal print, once again perfect for a birthday celebration!


Soo Wheeler
Design by Soo Wheeler

Topiary designs (topiary meaning - ball like shape) also make perfect air-filled centrepiece designs. Above is a beautiful example of a delicate 'Double Bubble' topiary centrepiece made by Soo Wheeler. Soo's topiary creates a feeling of romance, elegance and gentleness, perfect for a wedding or with a slight change of balloons, this same design could be used for a Christening or Baptism celebration. I love the use of the 5" Just Married Flowers-A-Round latex print #39286.

The Topiary technique can be so very versatile, and can be adapted to suit almost any occasion. I have included a few of more of my favourite idea's below.


Laura Serrano
Design by Laura Serrano
 This stunning Magenta 4" Hearts Topiary is so beautiful and elegant, the organza ribbon and cellophane 'picks' compliment this design perfectly. I can visualise this design in many different colours and being used for many different occasions! 


Linda Bruce
Design by Linda Bruce 


Here is another topiary centrepiece, this one was created by Linda Bruce. The design is simple yet elegant, the ribbon creates the perfect link between the base and the top, and the raffia ribbon add's a visual texture to the design.


Balloontime Roma
Design by Balloontime Roma.


Here is another beautiful example of a topiary design by Balloontime, Roma. Set in a flower pot, it creates the appearance of a flower or tree. The soft colours would indicate this design is for a Christening or a new baby!


Nadia Azar
Design by Nadia Azar


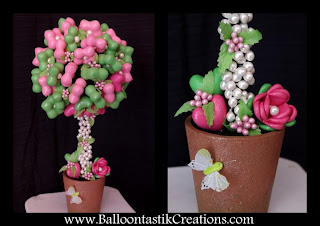
Nadia Azar gives us another great take on the topiary technique. Nadia has used 'puffed' Geo Blossoms... the visual texture is great along with the fresh colours of Lime & Pinks!


Below is another great air-filled design created by Anne Cahill McGovern... It's so simple but so very effective! The 6" Qualatex GEO Blossoms look great in these arrangements... just 3 on each of the tables and they look amazing!


Anne Cahill mcGovern
Design by Anne Cahill McGovern
Colin Myles
Design by Colin Myles


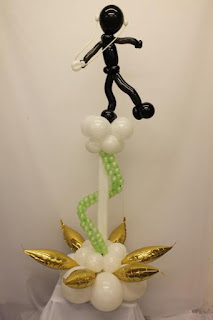
I had to include this fantastic design by Colin Myles! It is packed with visual movement and line!
The 6-balloon cluster base gives perfect visual stability, the 13" Taper balloons add a sense of 'spotlight' to the dancer on the platform along with the 'woven' line guiding light and movement up the column and finally the 'music' guy, dancing on his platform... such a fun and clever design Colin!


Jose Lutman
Design by Jose Lutman


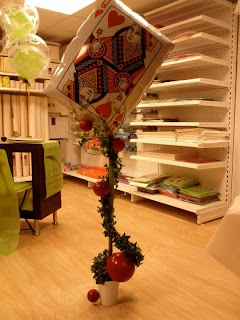
Jose Lutman has a really modern artistic flair when it comes to balloons, I always love to see his ideas and inspirations. I really like his idea of the 'Queen of Hearts' 30" Playing card at the top of this elegant garland of greenery and the simple addition of carefully placed red balloons!

There is a great 'Designer Showcase' of Jose work in APR/MAY/Jun 2012 balloon Images  magazine. 
Images article featuring Jose Lutman

Finally, I cannot complete this blog without mentioning Idit & Hagai Schwartz from Israel, their business is based round centrepiece designs, there is a great article in Images APR/MAY/JUN 2011 called 'Center of Attention'. Idit and Hagai's work is creative, elegant and inspiring, all the designs featured in the article are air-filled... and very beautiful!

Images article featuring Idit & Hagai Schwartz
I have really enjoyed gathering designs for this blog, it has been wonderful re-visiting many of the photographs that have been generously posted and shared on the Qualatex Facebook Group page. I would like to say a huge thank you to all those I have featured in this blog, your continuous idea's and techniques are a great inspiration to us all!

Happy Ballooning!

Sue
www.suebowler.com


Thursday, March 1, 2012

Wedding Decor... a little Inspiration for 2012 weddings

It won't be too long before the 2012 wedding season is truly upon us, so I thought that a little bit of wedding inspiration might be a good idea!
Sue Bowler
Designed by Sue Bowler CBA


"So how do we 'find' our Wedding decor inspiration and get some fresh idea's"? 
I always try and do as much research as possible, check out what's 'hot' and in fashion with both colour and themes.

Start by doing a little bit of 'surfing' around the web, you can find a whole host of information and idea's! Just use key words like Wedding Colors 2012, Wedding Trends 2012, Wedding Theme 2012, just keep trying different words, you'll be amazed at what you'll find out... save the websites that you like best to your favourites so that you can easily find them again!

For 2012 wedding colours I found many great sites, including Martha Stewarts Weddings, which has some great information, like these Perfect Palettes, click on the link below to see more great information from her website!
On-line Resources
www.marsthastewartweddings.com
Use the great resources that are ready available on www.Qualatex.com such as The Wedding Business Booster for fantastic decor idea's and great business tips!
Wedding Business Booster
If you are a QBN Member you have many other additional resources available on the Qualatex website, like these great downloadable photographs (and many more) from the resource centre that you can easily accessed from the lefthand side of the homepage... simply click, sign in and see what's available!

Free resource for QBN members


Learn and be inspired by others by investing in training & knowledge.

Attend the World Balloon Convention or a Qualatex Event, or alternatively take a 1 day wedding course or learn from professional Balloon Design DVD's.
For those of you attending the World Balloon Convention there are some great wedding design classes such as Magical Wedding Moments with Steven Mayhew CBA and Weddings with Italian Flair! With Alberto Falcone CBA

DVD's


very best balloon blog
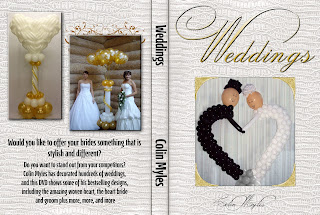
Great NEW Weddings  DVD by Colin Myles CBA www.smileyballoons.com

Sue Bowler
Master Series DVD
Courses 

The Wedding Series 1 & 2
This is a series of courses that I have written for Qualatex. They have been designed to maximise sales opportunities from brides and increase demand for more creative and profitable decor!  To find out more and where these courses are being taught visit www.thequalatexevent.com website. For other great courses visit 'Shows and Events' on the Qualatex Website.

Wedding Series Course www.thequalatexevent.com


The Qualatex Facebook Group is also a fantastic source of inspiration! I have selected a few pictures from the photo gallery... there are so many great pictures it was hard to choose!
A huge thank you to all of you who submit your pictures to inspire others and a special big thank you to the designers of the photographs that I have used below! 


Alessandro Patene
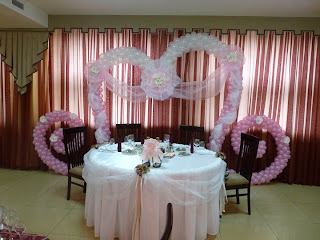
Beautiful Framed Heart by Alessandro Patane CBA of Balloon Express  Shop Sicilia, Italy

Nadia Azar
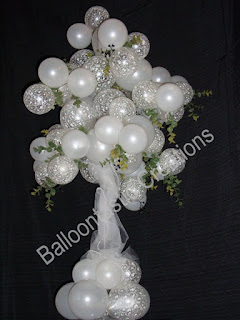
'Balloon Tree' by Nadia Azar, Balloontastic Creations, New Jersey, USA

Funtastik Balloons
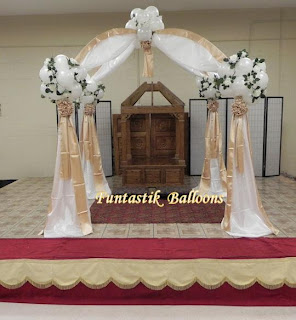
Wedding Arbour by Funtastik Balloons, Florida, USA

Jose Lutman
Elegant Hearts - Jose Lutman CBA, Mulhouse, France

Jose Lutman
Just Married Hearts by Jose Lutman CBA, Mulhouse, France

Luz Marina Paz Bucio
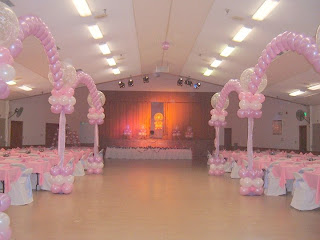
Elegant Columns & Arches by Luz Marina Paz Bucio, CBA, Fiesta Party Corp, Indiana, USA

Matthew Lewis
Free Standing 36" Wedding Heart by Matthew Lewis CBA - Matthew Lewis Displays, Coventry, UK

Svetlana Lugovaya
Svetlana Lugovaya ,Orenburg, Russia

Nadia Azar
Elegant Centerpiece by Nadia Azar, Balloontastic Creations, New Jersey, USA

Tania Torres
Bride & Groom Sculpture by Tania Torres CBA , Balloon Express Shop, Sicila, Italy

Tania Torres
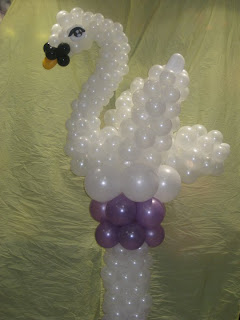
Elegant Swan by Tania Torres CBA, Balloon Express Shop, Sicilia, Italy

Ballooncake
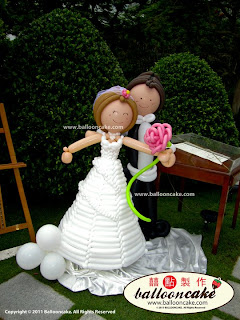
Bride & Groom by Ballooncake CBA

Stunning Ceiling Decor by Matthew Lewis Displays, Coventry, UK


Rosanna Cedeno
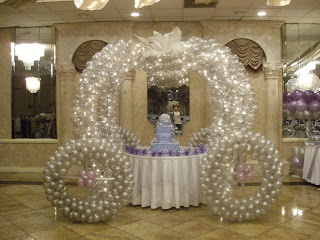
Fairy Tale Cake Table by Rosanna Cedeno, New York, USA

All Occasions Sunderland Uk
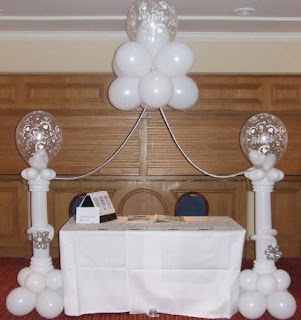
Elegant Columns and Wedding Cloud by All Occasions, Sunderland, UK

Nadia Azar
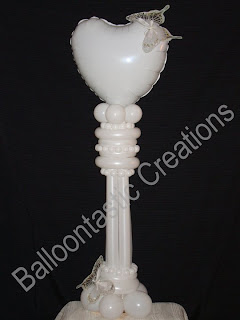
White Butterfly and Heart Column by Nadia Azar, Balloontastic Creations, New Jersey, USA 
Colin Myles
3' Just Married Hearts-A-Round by Colin Myles CBA, Smiley Balloons, Dundee, Scotland
I hope that this has given you a little inspiration for the forthcoming wedding season? Don't forget all the fantastic Qualatex balloons that are just perfect for weddings... here are a few of my favourites!

Ivory Rose & Butterflies #31254 


Deco Bubble Scroll Filigree All Around #23593
Sue Bowler
Deco Bubble 24" Elegant Roses & Butterflies #29718 with Just Married Butterflies-A-Round 11" Latex 
But please do not let me influence you :) Check out the great range of Wedding latex, Microfoil® and Qualatex Bubble balloons! Download the 2012 Qualatex catalogue today if you do not already have i

Looking forward to seeing many of you at WBC 2012 in Dallas... !

Sue

Friday, December 16, 2011

An elegant centerpiece idea for a New Year's Gala Party!


Sue Bowler
Picture 1
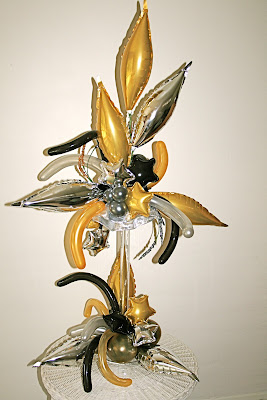
I was recently looking back through some of my photographs and came across the centerpiece that I designed and created for the Gala Party at the World Balloon Convention 2010.  I thought that this design would be perfect for an elegant New Years celebration party! 


I would like to clarify at this point that the design you can see in picture 1 is not the final design that I used, this was the first of a few that I created during the design process and as you can see this is not a centerpiece, more of an arrangement! Why... because there is no visual gap between the base and the top elements, which means that if I was to put this in the middle of a table, the guest would not be able to see each other! But this picture shows clearly both the base and the top designs, which is why I have used it in this blog!


Celebrate New Year Sparkle # 99797 34"

Looking at the fantastic range of Qualatex New Year's Microfoil and latex balloons available I can see how this design would really work well for a New Years party! The color palette is Black, Gold and Silver, Stars and Swirls are the main design element that repeats throughout most of the New Years balloons, allowing us to create unity.

Rather than teach you how to re-create this design as shown above, I thought that I would take you through each of the elements step-by step, you can then decide if you would want to make the whole design or maybe just part of it, which is what we did for the World Balloon Convention.

There are quite a few different elements that make up this design.

Picture 2
I started with a Lomey dish base, this is a product made by Smithers Oasis, many balloon distributors sell this and other Smithers products. I then secured a square of DRY floral foam using a cool glue gun.
TIP 1. Do not be tempted to use too much floral foam, the more you use, the more you have to fill or hide!
Picture 3
Talking about hiding the mechanics, I knew that this may be a problem, so I started by creating a 'skirt' of fabric around the edge of the foam before I even started to add any elements. Try using a fabric that has a finished edge rather than a 'raw' edge that may fray and look untidy. This fabric is also a Smithers product and has a lovely metallic look. I used floral 'reel' wire to gather up the fabric and then pulled it into the dry foam, I did not need to use any glue! If you look at Picture 1, you will see that I used a Silver fabric for the base cover.

Picture 4
Now I added in the 13" Tapers (these balloons need to be heat sealed, if you are unsure how to do this see Tip 2 below). These were placed in different positions. Picture 4 represents the base design and Picture 5 is the top element. If you were going to only create a base design, you will need to work with Picture 4 as the Tapers in Picture 5 would make your design too tall for a base - 
Remember the 14" height rule!
Picture 5


To secure the tapers into the Dry Foam, I used Premium Balloon Cups-N-Sticks. If you can get the clear one's these are perfect!

The Tapers create the visual line of the deign creating both horizontal and vertical lines and are the main focal point, all the other elements that we add are known as 'accent elements' and should compliment the design and not compete!


Picture 6


Picture 7


The first of the accent detail is adding in 4" Microfoil Stars, picking out all the colours in the design. If you currently do not use these wonderful little balloons you should! They are for me what really makes our centerpiece work amazing. They can be prepared well in advance as they will last forever!


TIP 2. If you are unsure how to heat seal the small Microfoil balloons then visit my earlier blog - Heat Sealing Qualatex Microfoil Balloons!

Once again I use Premium Balloon Stems and Cups-N-Sticks to position them into my design. However, if I remember correctly, on the day of mass production, I think that we started tying the stars into groups of 3 and then used a floral wire 'pin' to secure the cluster in position.

Pictures 7 & 8 shows you how I placed the stars for best effect.

Picture 8


Picture 9


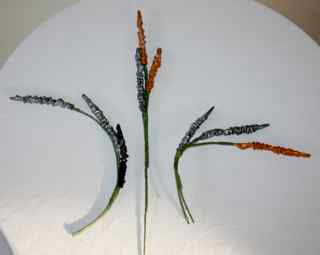
I love the technique shown in Picture 9, it is still all balloons, but allows us to create some beautiful lines within a centerpiece! What you need to do is take a 260Q, remove the bead or lips, then take a floral wire 18 gauge or 1.02mm wire- try and get the longest wires possible and plastic coated too, otherwise the steel can get rusty and you will need to clean them before you use!
Bend the very tip of the wire over using a pair of 'Pinch Nose' pliers and then wrap the bent tip with a little floral tape. Now gently pull the 260Q over the wire, using the removed bead you can secure the 260Q to the wire at the tip. Now 'scrunch' the 260Q by pushing it up the wire, see Picture 9 then use a little floral tape to hold the balloon in position. I used 3 of these together to create the elements in Picture 9.

Picture 10
I also used 160Q's and 260Q's inflating the tips only (Picture 10) , using the warmth of my hand bend these into curves, again to create elegant lines within the design.


Picture 11
Position both the 260Q 'Scrunchies' and the 160Q & 260Q 'Curves', into the design, look back at Picture 1 and see how these elements create fantastic visual movement.


Finally, I added 2 x 3-balloon clusters of under-inflated 5" (one on each side), which I double stuffed to create a really intense metallic color! The 'Silver' balloon are Black inside Silver and only inflated to approx. 2", be careful not to make them too big!

Picture 12

This is not the easiest of designs to explain or create, but there maybe some ideas and techniques that you can use to make yours!  I hope that you have some great bookings for the New Years celebrations! Good luck!
New Years Sparkle # 27673 18"

With seasonal best wishes!

Sue 

The tools that you will need:
Floral Tape

18 Gauge or 1.02mm Floral Wire

Pinch Nose Pliers

Reel Wire