 |
| Picture 1 |
I was recently looking back through some of my photographs and came across the centerpiece that I designed and created for the Gala Party at the World Balloon Convention 2010. I thought that this design would be perfect for an elegant New Years celebration party!
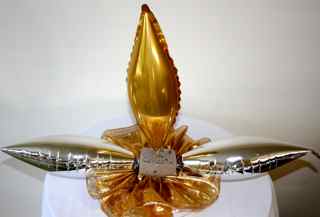
I would like to clarify at this point that the design you can see in picture 1 is not the final design that I used, this was the first of a few that I created during the design process and as you can see this is not a centerpiece, more of an arrangement! Why... because there is no visual gap between the base and the top elements, which means that if I was to put this in the middle of a table, the guest would not be able to see each other! But this picture shows clearly both the base and the top designs, which is why I have used it in this blog!
 |
| Celebrate New Year Sparkle # 99797 34" |
Looking at the fantastic range of Qualatex New Year's Microfoil and latex balloons available I can see how this design would really work well for a New Years party! The color palette is Black, Gold and Silver, Stars and Swirls are the main design element that repeats throughout most of the New Years balloons, allowing us to create unity.
Rather than teach you how to re-create this design as shown above, I thought that I would take you through each of the elements step-by step, you can then decide if you would want to make the whole design or maybe just part of it, which is what we did for the World Balloon Convention.
There are quite a few different elements that make up this design.
 |
| Picture 2 |
I started with a Lomey dish base, this is a product made by
Smithers Oasis, many balloon distributors sell this and other Smithers products. I then secured a square of DRY floral foam using a cool glue gun.
TIP 1. Do not be tempted to use too much floral foam, the more you use, the more you have to fill or hide!
 |
| Picture 3 |
Talking about hiding the mechanics, I knew that this may be a problem, so I started by creating a 'skirt' of fabric around the edge of the foam before I even started to add any elements. Try using a fabric that has a finished edge rather than a 'raw' edge that may fray and look untidy. This fabric is also a Smithers product and has a lovely metallic look. I used floral 'reel' wire to gather up the fabric and then pulled it into the dry foam, I did not need to use any glue! If you look at Picture 1, you will see that I used a Silver fabric for the base cover.
 |
| Picture 4 |
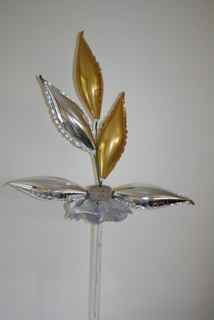
Now I added in the 13" Tapers (these balloons need to be heat sealed, if you are unsure how to do this see Tip 2 below). These were placed in different positions. Picture 4 represents the base design and Picture 5 is the top element. If you were going to only create a base design, you will need to work with Picture 4 as the Tapers in Picture 5 would make your design too tall for a base -
Remember the 14" height rule!
 |
| Picture 5 |
The Tapers create the visual line of the deign creating both horizontal and vertical lines and are the main focal point, all the other elements that we add are known as 'accent elements' and should compliment the design and not compete!
 |
| Picture 6 |
 |
| Picture 7 |
|
|
|
|
The first of the accent detail is adding in 4" Microfoil Stars, picking out all the colours in the design. If you currently do not use these wonderful little balloons you should! They are for me what really makes our centerpiece work amazing. They can be prepared well in advance as they will last forever!
Once again I use Premium Balloon Stems and Cups-N-Sticks to position them into my design. However, if I remember correctly, on the day of mass production, I think that we started tying the stars into groups of 3 and then used a floral wire 'pin' to secure the cluster in position.
Pictures 7 & 8 shows you how I placed the stars for best effect.
 |
| Picture 8 |
 |
| Picture 9 |
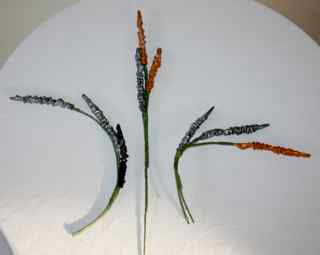
I love the technique shown in Picture 9, it is still all balloons, but allows us to
create some beautiful lines within a centerpiece! What you need to do is take a
260Q, remove the bead or lips, then take a floral wire 18 gauge or
1.02mm wire- try and get the longest wires possible and plastic coated too, otherwise the steel can get rusty and you will need to clean them before you use!
Bend the very tip of the wire over using a pair of 'Pinch Nose' pliers and then wrap the bent tip with a little floral tape. Now gently pull the 260Q over the wire, using the removed bead you can secure the 260Q to the wire at the tip. Now 'scrunch' the 260Q by pushing it up the wire, see Picture 9 then use a little floral tape to hold the balloon in position. I used 3 of these together to create the elements in Picture 9.
 |
| Picture 10 |
I also used 160Q's and 260Q's inflating the tips only (Picture 10) , using the warmth of my hand bend these into curves, again to create elegant lines within the design.
 |
| Picture 11 |
Position both the 260Q 'Scrunchies' and the 160Q & 260Q 'Curves', into the design, look back at Picture 1 and see how these elements create fantastic visual movement.
Finally, I added 2 x 3-balloon clusters of under-inflated 5" (one on each side), which I double stuffed to create a really intense metallic color! The 'Silver' balloon are Black inside Silver and only inflated to approx. 2", be careful not to make them too big!
 |
| Picture 12 |
This is not the easiest of designs to explain or create, but there maybe some ideas and techniques that you can use to make yours! I hope that you have some great bookings for the New Years celebrations! Good luck!
 |
| New Years Sparkle # 27673 18" |
With seasonal best wishes!
Sue
The tools that you will need:
 |
| Floral Tape |
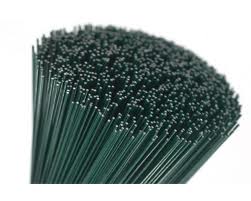 |
| 18 Gauge or 1.02mm Floral Wire |
 |
| Pinch Nose Pliers |
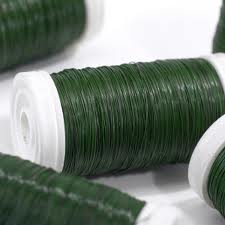 |
| Reel Wire |


