When I first started in the world of balloons there was a distinct difference between a balloon decorator and a twister and never did the twain meet!
However over the years, there has been an increasing overlap between these two worlds in the form of deco-twisting. The term "deco twisting" was first coined in the late 90's by several artists who displayed twisted elements in their balloon decor. However, deco twisting only really started to become popular with balloon artists and customers from around 2010. Ten+ years on, it is more popular than ever, especially when you look at all the detailed Marquee Balloon designs that are extremely popular today where there is always the addition of fabulously twisted details!
We all have our own ways of doing things when it comes to working with balloons. We learn in different ways and develop our own technique along the way. Over the past 30 years, I have learned many great techniques and some fabulous tips and tricks that have made my life much easier and my balloon designs look even better. But as I always say, I am still learning, and I love it when I see something exciting and new!
Today, I would like to share with you a few more tips and tricks that may help you develop your own techniques!
Our first trick is from Tina Giunta of Shivoo Balloons in Melbourne, Australia. In the video below, Tina shares her own technique for making 11" confetti-filled balloons. If I am honest, I have always been very wary of making confetti balloons using 11" balloons; however Tina's amazing homemade applicator makes it so very quick and easy!
Every day, I see more and more dećor that incorporate chains of precision bubbles within the design, such as this baby design shown on the right, with the bubbles wrapped around the pole. Adding small details to a design can really increase its value, but the cost to you can be minimal.
Decor Menus - Streamline sales with a decor menu.
Decor menus are a helpful, multi-use tool allows customers to see your most popular and profitable balloon offerings in one place.
Ideal for websites, Decor Menus can also help weed out price shoppers (customers who are looking for the lowest price), leaving you more time to spend with serious clients.
More importantly, a Decor Menu can help to streamline your sales process by letting you feature the designs you want your customers to see. The visual aspect for decor menus cannot be understated. Customers can look at your menus and see the designs they want and the correct name for it. If you take the guesswork out of the buying process, customers can tell you exactly what they want to know, and they will know what they are getting.
Just because Decor Menus display standardised designs, it does not mean your creativity is limited. In fact, designs on your menu can be shown in conjunction with your project galleries and create multiple variations of decor your customers like.
A huge thank you to David Mahoney from Balloons Everyday in Dallas, Texas, USA., for sharing two of his pricing guides.
If this is something that you are unsure how to make, then you will be pleased to know that Rachel Porter, CBA, of Balloon Clip Art, of Balloon Splendor in Bothell, Washington, USA., has created many templates that you can purchase for a nominal fee from her Etsy shop. There are five different styles to choose from and many variations with each style!
Rachel also has a Facebook Group - https://www.facebook.com/groups/balloonartclipart. This is a closed group, so you will need to apply to join, you just have to show evidence of your Ballooning Facebook Page or Instagram account to verify that you are an authentic balloon company.
Thank you to Tina Giunta, Q Corner, David Mahoney and Rachel Porter for sharing and contributing to this post!
Spiral Columns made with modelling balloons such as 260Q and 160Q have always been a favourite of mine. They are quick to make, always look elegant, and are a great way to decorate a pole when creating a design that uses a pole and base structure. As with all techniques, they need to be practiced to ensure that you get perfect results every time!
Design 1. Single, one colour Spiral - This beautiful column made with all shades of green was designed and created by Eve Antonello, CBA, Pioneer Balloon Company, Wichita, KS, USA.
Shimmering Emerald Stars - Design by Eve Antonello.
Design 2. Single, double or multi-coloured spiral column. Still working with four balloons, using two or more colours brings a whole new look to this style of design! - These colourful 'Fashionable Fish' centrepiece was the crowning glory at this summer party, and brought an explosion of colour into a huge and very plain marquee tent.
Fabulous Fish Centrepieces by Sue Bowler, CBA.
3. Double Spiral Column using Eight Balloons. This design takes this technique to the next level, and is a fabulous example of Candy Strip style decor! By simply changing the colours, we can completely change the look and easily execute the effect that we want to create.
Christmas Candy Swirl Arch by Sue Bowler, CBA.
4. Double Spiral Column with Precision Bubbles. How lovely does this effect look as a finishing touch on this baby design column! Because you're working with eight modelling balloons, and you are introducing Precision Bubbles, this technique is a little bit trickier than the others shown above, but definitely worth the extra effort!
It's A Girl - Baby & Moon Column by Sue Bowler, CBA.
To learn how to create this style of décor check out the video below!
Here are some more inspiring design ideas using this technique! This video explains step-by-step how to create each of the styles of columns shown above.
Lion Tamer Pedestal
Place two of these Columns at the event entrance, or use them to draw attention to other focal areas at a circus-themed party.
Designer name: Sue Bowler, CBA, Balloon Art by Sue Bowler, Oxfordshire, UK
Got Treats?
So cute it’s scary!
Designer name: Sam Jossie, CBA, Pioneer® Balloon Company
It’s All So Magical!
The perfect decor accent for the princess on her special day!
Designer name: Eve Antonello, CBA, Pioneer Balloon Company, Wichita, KS, USA
Come Close Valentine!
Designer name: Eve Antonello, CBA, Pioneer Balloon Company, Wichita, KS, USA
If you have always wanted to know how to create this style of décor, or maybe have struggled to get the perfect, tight spirals, I hope that this post has helped!
Are you ready to step it up a notch and learn a few more tips and tricks that help make great posts for Instagram and Facebook!
By now, you might realise (if you have watched How to Create Inspiring Instagram and Facebook Posts for the Non-Designer - Part 1) that I am a little bit of a Canva enthusiast, and enjoy spending time experimenting with the fantastic features that Canva offers. So far, in my video demonstrations, I have only demonstrated the use of the free version of Canva. In this tutorial, I will show how to create designs using features from both the free and from Canva Pro which is a paid for subscription.
It is defiantly worth trying Canva Pro - they even offer a free 28 day trial of the pro version. You will need to use a credit card to set up your account, but you can easily cancel the subscription if you decide that Canva Pro is not for you! Just make sure that you make a note to do this before the subscription kicks in.
Let's look at a few more great features on the free version before we head off to Canva Pro.
Check out the video below to see how to add a background and text to an image and also how to add a little animation too!
This is the adorable 'Shine Bright' image by Cam Woody, which I downloaded from the Qualatex - Inspiration - Balloon Decor section. Please note that only QBN members and CBA's have the ability to download high-resolution copies of these images. If you are not a QBN member or CBA, remember that Qualatex has some amazing and FREE marketing materials available to everyone, and all are welcome to use these resources for social media posts. Even better, you can use Canva to add your own text and create your own unique posts!
With a little (free) Canva magic, I added a background and a little seasonal text - view the video to see how!
Canva also has the ability to 'animate' your post (also a free function) although there are some professional options too which you can use when you upgrade to the pro version. Posting little videos on Instagram is a great way to attract new followers! Statistically, videos are viewed even more than photographs!
Here is another free marketing image from the Qualatex Lifestyle Photo section that I downloaded, then added my own slogan to!
How to smarten up your own photos
Check out the video to see how to remove the background from one of your photos and replace it with a new background!
I know that many of you are very keen to know how you can turn some of your own ballooning photographs into more appealing Instagram posts. Getting the perfect photo is almost impossible without being in a professional studio. Let me show you a few tricks that will hopefully change all that!
I will start with one of my more recent images of a Number Five frame that I made. Before taking the frame outside, which was where it was intended to go, I took a photograph with the frame on a table. The lighting was appalling, and the setting not much better!
Using one of the Canva Pro features, I was able to remove the background and replace it with something that helped my design to stand out better!
Here are a few more before and after shots!
Before
After a little Canva Pro Makeover
Keep in mind, not all photos edit successfully using the Canva Pro Background Remover Tool, and the results can be disappointing. Something to keep in mind in this case is you don't always need to show the whole image; sometimes just showing a small section of a photo can be just as appealing!
I hope that you have enjoyed this tutorial and that it has been helpful! Hopefully this quick tutorial will get you started, and maybe like me, you will even get a little bit addicted and start producing some truly beneficial posts!
In Part 1 of this two-part video tutorial, I demonstrate how to create the perfect frame for this super cute "Baby Moon" design. For a direct link to this video, click HERE. Here is a reminder of the materials and equipment that you will need to make the frame:
Frame Material and Equipment List:
1 x 3m length - 6mm or 1/4" Aluminium Rod
Pipe or Bolt Cutters
Gaffa or Duct Tape
Pipe Bender if you have one but it's not essential
NOT (Lamp) Base - this is an inexpensive IKEA (lamp) product that many balloon professionals use to support designs.
NOT (Lamp) Pole x 1 (If you don't have access to an IKEA NOT Base and Pole you will need to find a good, similar alternative.)
White Floral Quick Drying Spray Paint
String or ribbon to measure
Circular Template - such as a hoop
Balloon Material List - you can change the balloon colours to suit your client's needs.
5" Pearl White - optional, but it does give a slightly different textural look to the plain white
5" Diamond Clear - approximately 10
7" Chrome Gold - approximately 10
260Q Chrome Gold - approximately 15
260Q Pink - 4-5
Other items:
Gold Metallic Confetti
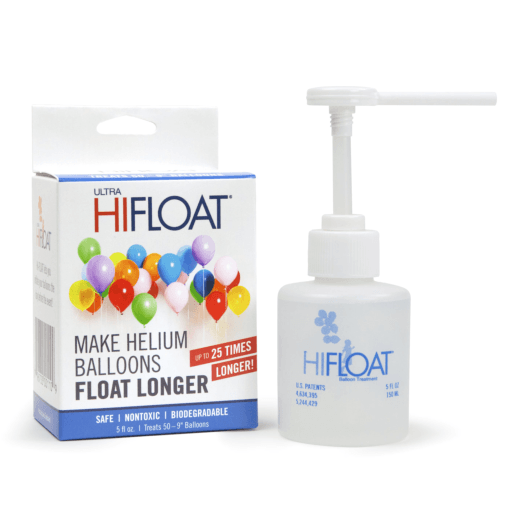
Ultra Hi-Float - I use the NEW Mini Bottle - 148ml (5oz) as the nozzle is perfect for using with 5" and 260Q balloons
Premium Twin-Air Sizer II Balloon Inflator - this will help you naturally size your balloons using the "10th's of a second" timer adjustment. While you can use any inflator to make this design, I use the Twin-Air as it makes the sizing of the balloons very easy!
Castration Pliers - to stretch open the 5" balloons
You may also want to use a few Uglu Dashes when connecting the foil balloon and pink ribbon for a nice finishing touch!
I hope that you have enjoyed learning how to make this beautiful baby design, and I wish you every success making and selling this design in the future!
The frame is probably the most important part of any frame based design. Get it right, and your design will look amazing! But getting wrong - out of proportion, or the wrong shape, can lead to you being disappointed with the end result.
Frame Material and Equipment List:
1 x 3m length - 6mm or 1/4" Aluminium Rod
Pipe or Bolt Cutters
Gaffa or Duct Tape
Pipe Bender if you have one but it's not essential
NOT (Lamp) Base - this is an inexpensive IKEA (lamp) product that many balloon professionals use to support designs.
NOT (Lamp) Pole x 1 (If you don't have access to an IKEA NOT Base and Pole you will need to find a good, similar alternative.)
White Floral Quick Drying Spray Paint
String or ribbon to measure
Circular Template - such as a hoop
Balloon Material List:
Although I am not adding the balloons in Part1. here is a list of the balloons and accessories that I will be using so that you can get them prepared for when your frame is ready!
18" Baby Girl Pink Stripes Microfoil Balloon
11" White - only a few for the cloud base
5" Pink or Rose
5" Pearl Pink - optional
5" White
5" Pearl White - optional, but it does give a slightly different textural look to the plain white
5" Diamond Clear - approximately 10
7" Chrome Gold - approximately 10
260Q Chrome Gold - approximately 15
260Q Pink - 4-5
All the balloons that I am using for this design are Qualatex - www.Qualatex.com Gold Confetti - ideally a small square cut Hi-Float - I like to use the new 148ml (5oz) bottle as the nozzle is perfect for 5" and 260Q Castration Pliers - ideal 'Stretching Tool' for balloons - available through some balloon wholesalers, Amazon, and farming supply companies. I will be using a Premium Twin-Air Sizer to inflate the balloons, as it will allow me to use the "10th's of a seconds" timer adjustment to give me the perfect graduated sized balloons. Using a hand pump is not so easy to get the precision for this design.
I am hoping that many of you saw a post from Susan Dhillon, Marketing Communications Director of Pioneer Balloon Company on the Qualatex Facebook Group a few weeks ago? Susan shared some great news about an exciting, FREE, video resource - this might be on a time limit to help businesses during the Covid-19 crisis, but as of right now, it is definitely still available!
The website will open in a new window, so you can start working straight away!
I have made a short, screen shot video to take you through the process, but I strongly recommend that you take a few minutes to play with it and see the amazing videos you can make!
"One minute of video is worth 1.8 million words."
-Dr. James McQuivey of Forrester Research
Before you start:
Decide in advance what you want your video to be about.
Create a folder of photographs that you want to include in the video. Don't forget that there are some great free resources on the Qualatex website, such as Balloon Bouquets, Balloon Decor, life-style photographs, and other great marketing materials.
Prepare headlines, captions, and other copy entering on what you want to communicate in your advert. Research poems, slogans, and other marketing resources that relate to your video's topic.
Don't forget the code that you need at the check-out - Reach
I hope that you enjoy using this software as much as I have. I believe that this will be a great resource for our businesses.
Wow, have you had time to recover from watching all those amazing classes from the Q Corner Convention yet? What a truly fabulous five days that was, and definitely one that will go down in ballooning history! A huge thank you to Susan Dhillon, Eve Antonello and the entire Pioneer Balloon Company team who made this happen in such an incredibly short time! And of course, a very special thank you must go to Keith Stirman and Dominic Cassidy of Q Corner, who did an incredible job of both hosting and running this event, all while coping with very little sleep, and a fair share of technical glitches! As with all classes, 90 minutes is never quite as long as you think, and I still had one design in the wings that I sadly did not have time to show. So rather than waste the balloons and the design that I had prepared, I thought that I would make a short video that shows the bonus designs, plus a few additional tips! To understand the new design, you will need to watch the original class, so I have added the video here. Please note that the convention was filmed in parts, in which each of these parts is a number of classes (mine was the first to be recording in Part 6).
Here is the bonus video, I hope that you enjoy it!
To help you to recreate these designs, I have included product and material lists.
Product and Material Lists
100th Birthday Celebration Balloon Arrangement
#57050, #57048 (pkgd.) 2 - 18" Rose Gold Round Microfoil™️ Balloons See listed below the range of latex balloons that I used: #58283 - 260Q Chrome Gold #12939 - 260Q Chrome Rose Gold #85111 - 7" Chrome Gold #12936 - 7" Chrome Rose Gold #43562 - 5" Ivory Silk #43591 - 5" Pearl Peach #57340 - 5" Rose Gold #43584 - 5" Pearl Ivory 1 - 16" Cake Board Base Silk Roses & Greenery Double-sided Tape Strong Sticky Tape Uglu™️ Dashes/strong glue dots or Clik-Clik™️ Balloon Bond
1 x 12" Cake Board Base 1 x Black Hat Box 1 x Premium MaxiCup™️ II 1 x Premium Balloon Accessories MaxiStick™️ II 2 x Premium Balloon Accessories Original Cello-Cup Clear
I created this Tropical Centrepiece to compliment a design that I recently made with Balloon School Pro, Setting the Scene Part 1 - Duplet Square Pack Balloon Walls and Setting the Scene Part 2 - Tropical Theme Organic Garland and other accent details! This is a paid download - to find it click HERE
#68824 1 - 20" Deco Bubble #10464 1 - 14" Mini Pink Flamingo #43793 - 11" Jewel Sapphire Blue #85112 - 7" Chrome Blue
#85142 - 7" Chrome Green #43602 - 5" Jewel Sapphire Blue #99332 - 5" Fantasy Assortment - this includes both Jewel Sapphire Blue and Jewel Teal #43552 - 5" Diamond Clear #43607 - 5" White #58284 - 260Q Chrome Blue Tropical Leaves Metallic Confetti Hi-Float Uglu Dashes
Fairy Number Design
#97429, #97430 (pkgd.) 1 - 18" Pastel Ombré
#12245 1 - 14" Mini Fairy
#86369 1 - 16" Number Two Jelli Ombré
#43566 5" Pastel Pearl Assortment - in the video I said that I used the Sorbet Assortment, but this was an error.
#43607 5" White
#58283 260Q Chrome Gold
1 x 12" Cake Board Base Uglu Dashes
Double-Sided tape Strong Sticky Tape Heat Sealer
I hope that you enjoyed the bonus design and the few little extra tips! And don't forget, that you can catch-up with all of the classes anytime! Simply visit Q Corner on YouTube, find the class that you want to watch, and enjoy! Happy Ballooning!
Crepe paper fringing has been one of the hottest trends in Australia this year says Chris Adamo, of Balloons Online in Sydney, Australia! They are colourful, vibrant, and are the perfect compliment to balloon decor! If you are like me - when you see a photograph of something beautiful, you instinctively want to have a go at it, but you're not sure the best way to go about it.
Chris Adamo CBA from Balloons Online Australia recently made a step-by-step video (see below) that takes away all the mystery, and shows how he creates these beautiful fringes.
Thank you Chris for sharing this great technique with the Very Best® Balloon Blog readers, I am sure that many of us will be putting this into practise very quickly!